# Working With MetaMask in Waves Network
MetaMask (opens new window) is a browser extension popular among Ethereum users. It provides a cryptocurrency wallet and a way to interact with decentralized applications.
Waves protocol supports Ethereum type of transactions, that is why MetaMask users can interact with WX Network in various ways. An address of a MetaMask user consists of 20 bytes. A Waves address also contains 20 significant bytes, with addition of a prefix that is the same for all addresses of the blockchain network and a checksum. So, each address in MetaMask corresponds to a single Waves address and vice versa: the same 20 bytes are used as the address in the Ethereum representation and as the basis of the address in the Waves format. Every token ID supported in WX Network has its own representation in the Ethereum format and can be added to a MetaMask wallet.
To convert an address or token ID from one format to another, you can use the converter in Waves Explorer:
Warning! Do not use Waves addresses converted from Waves format to Ethereum format to interact with Ethereum network. Such addresses are intended for interaction with MetaMask only in the Waves network. If you send tokens to such an address from the Ethereum network, they will disappear irretrievably.
Currently MetaMask users can do the following by means of WX Network UI:
log in to WX Network wallet with MetaMask
deposit/withdraw any tokens supported in WX Network from/to MetaMask addresses (starting with 0x...) in Waves network;
add tokens supported in WX Network to MetaMask wallet in Waves network
There are other types of supported interactions of MetaMask with Waves network (such as invoking a dApp script and signing an exchange order) that are currently not possible via UI. Read more in the article for developers (opens new window).
# How to Switch MetaMask to Waves Network?
In order to work with MetaMask in WX Network, first of all, you need to switch it to the Waves network.
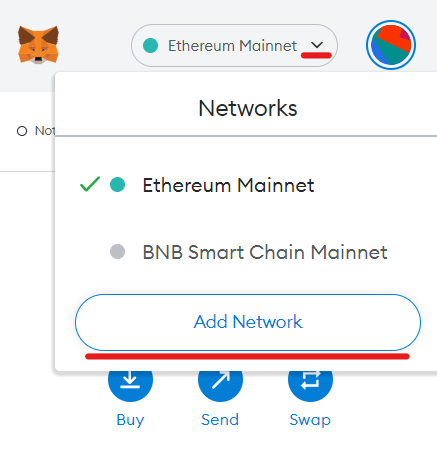
To do so, open your MetaMask browser extension and click Add Network.
In the window that opens, specify the following parameters and click Save:
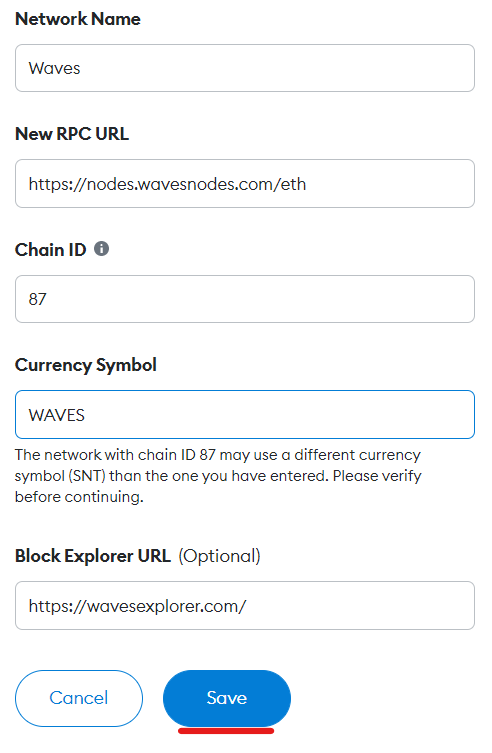
Network Name: Waves
New RPC URL: https://nodes.wavesnodes.com/eth (for Mainnet); https://nodes-testnet.wavesnodes.com/eth (for Testnet); https://nodes-stagenet.wavesnodes.com/eth (for Stagenet)
Chain ID: 87 (for Mainnet); 84 (for Testnet); 83 (for Stagenet)
Currency Symbol: WAVES
Block Explorer URL: https://wavesexplorer.com/
Now that you added Waves network, you can log In to your WX Network wallet with MetaMask, transfer tokens in Waves network between WX Network and MetaMask wallets and add tokens from WX Network wallet to MetaMask.
# How to Log In to WX Network Wallet With MetaMask?
To log in to WX Network wallet with MetaMask do the following:
First of all, make sure that you have Waves network selected in MetaMask.
Open WX Network (opens new window) and click Log In.

Select Ledger or Browser Extensions, then click MetaMask.
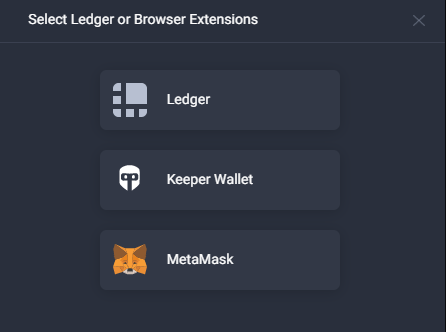
Confirm the request in your MetaMask browser extension.
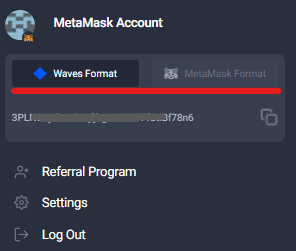
When you are logged in with MetaMask, you can review you address by clicking on your account avatar. You can also switch between Waves and MetaMask formats of the address
# How to Withdraw Tokens From WX Network to MetaMask Wallet?
To withdraw tokens from WX Network wallet to MetaMask, do the following:
Open your MetaMask browser extension and make sure that Waves network is selected, then copy your MetaMask address to clipboard.
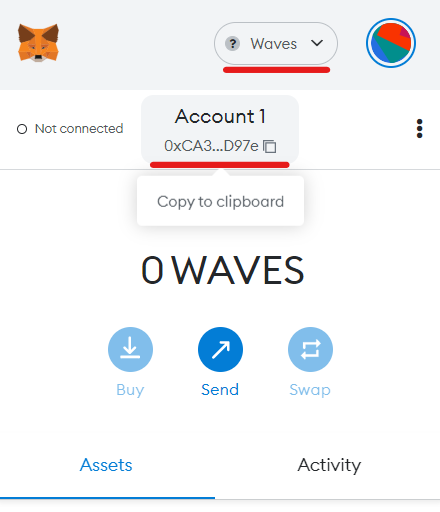
Open WX Network app, log in to your account and navigate to the Wallet tab.
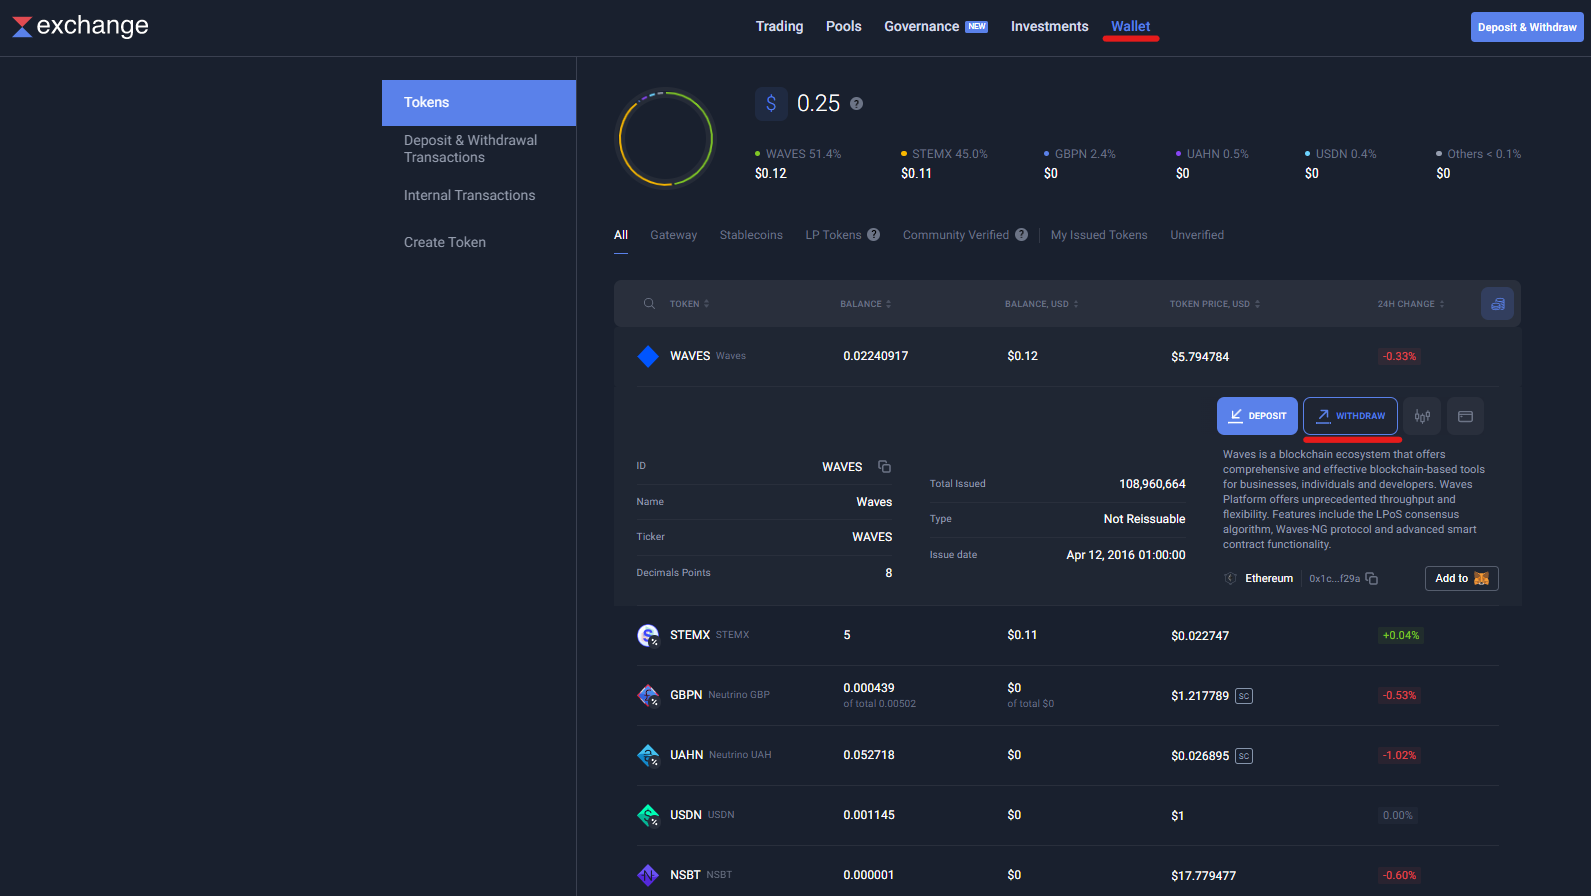
Find a token (for example, WAVES) that you want to withdraw to MetaMask wallet and click Withdraw.
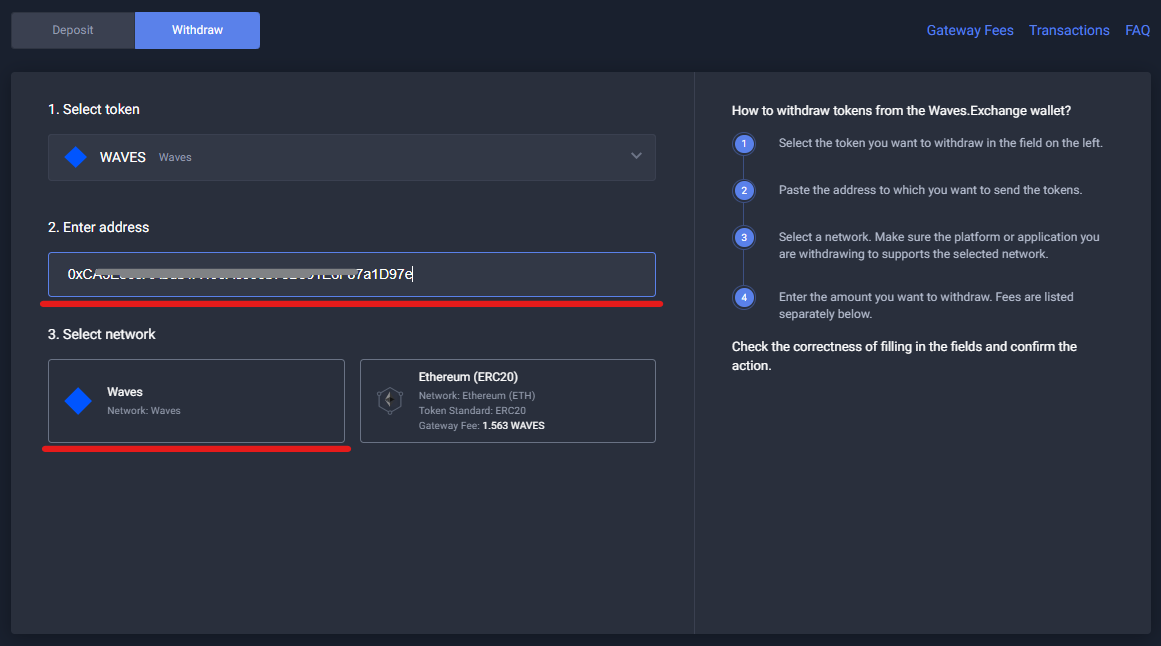
In the window that opens, paste the MetaMask address from the clipboard and select Waves network.
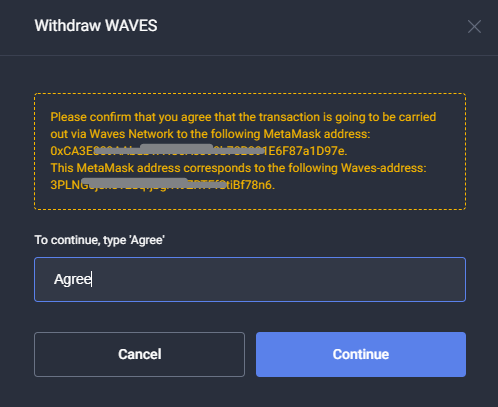
In the popup that opens, type Agree and click Continue.
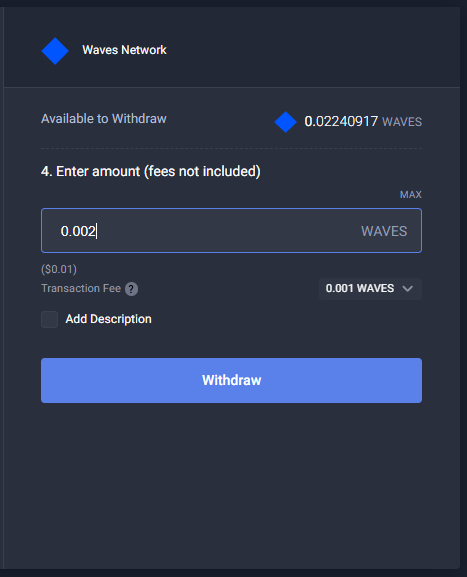
Specify the amount that you want to withdraw and click Withdraw.
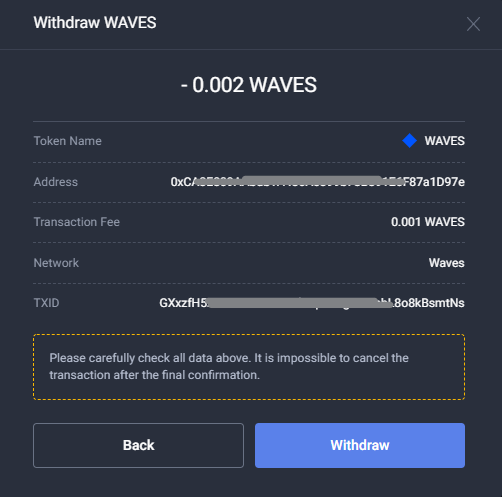
In the popup that opens, make sure that everything is correct and click Withdraw.
You can review the transaction status on the Wallet > Internal Transactions (opens new window) tab or in Waves Explorer (opens new window).
# How to Deposit Tokens From MetaMask to WX Network Wallet?
To deposit tokens from MetaMask to WX Network wallet, do the following:
Open WX Network app, log in to your account and navigate to the Wallet tab.
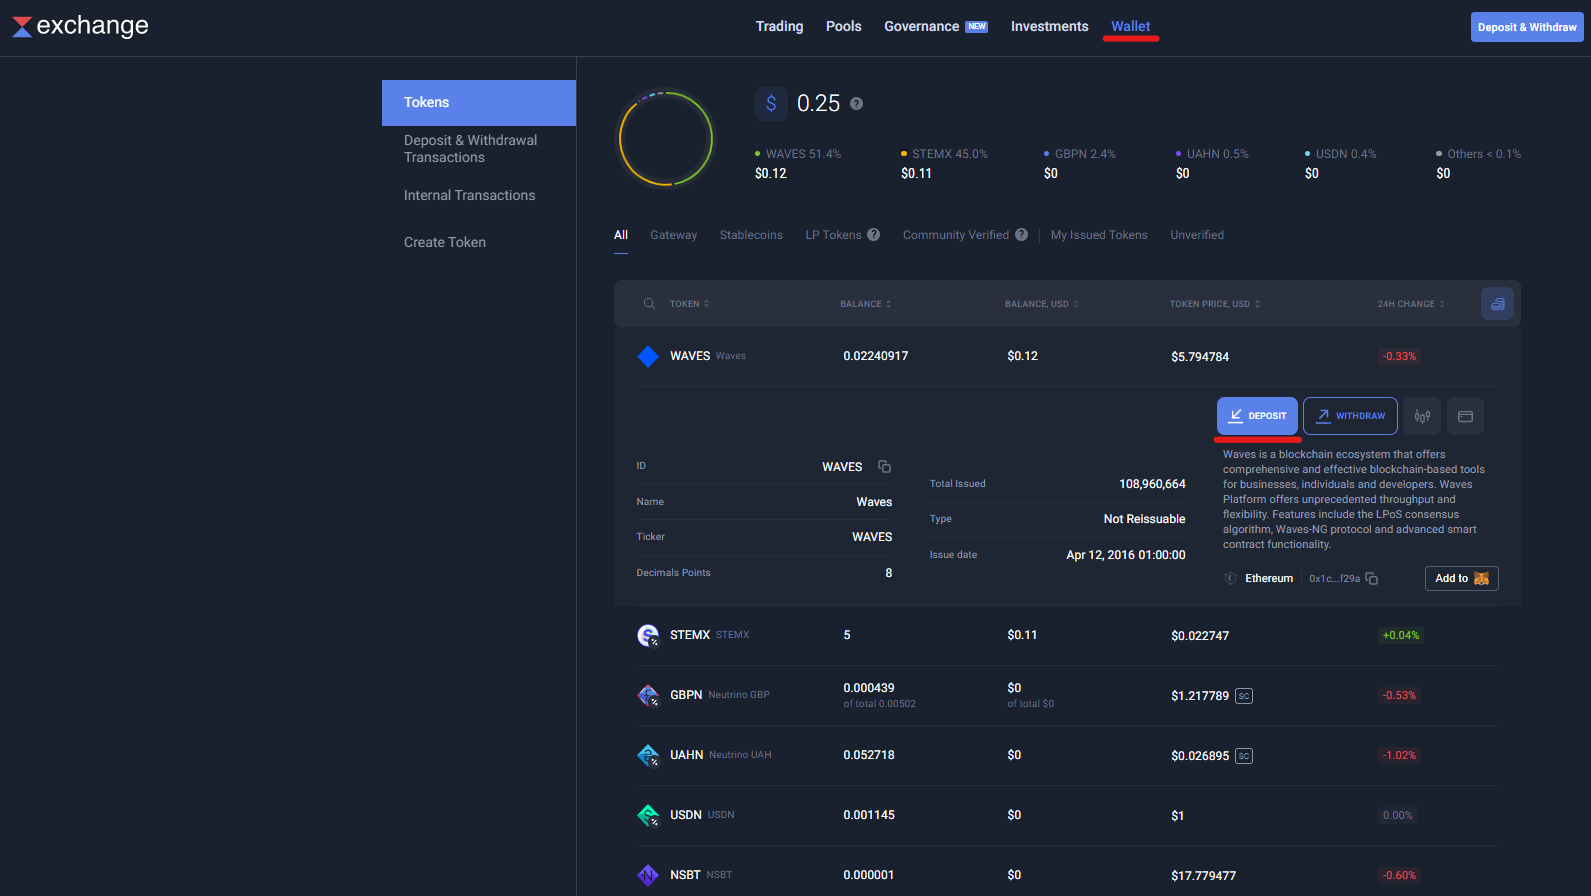
Find a token (for example, WAVES) that you want to deposit from MetaMask wallet and click Deposit.
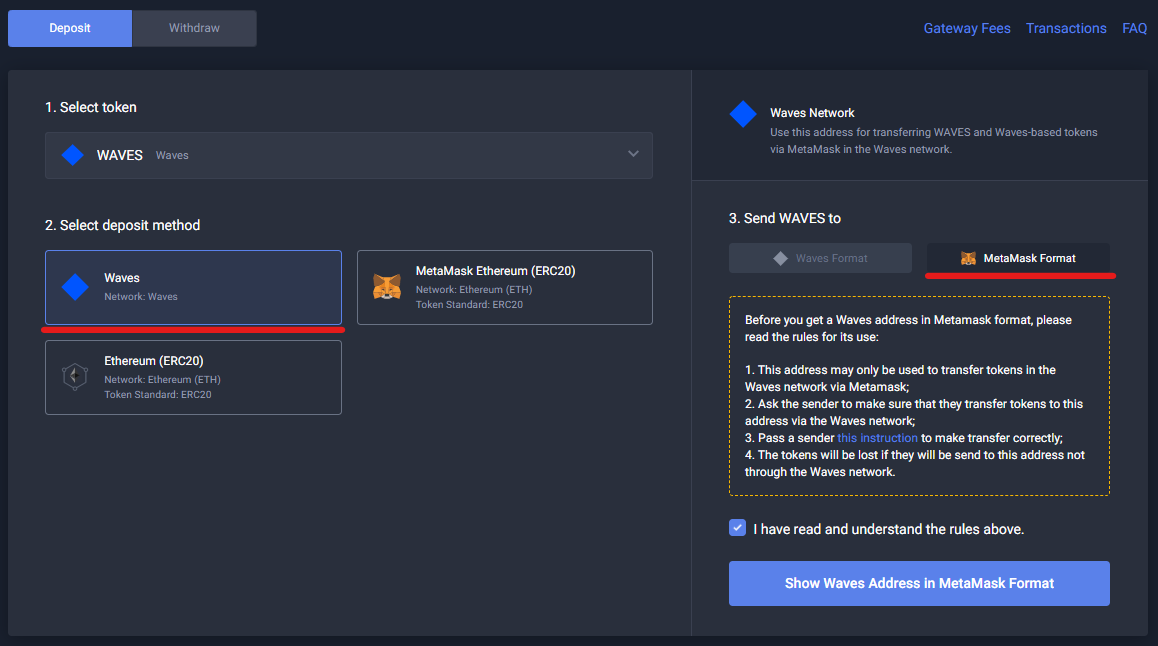
In the window that opens, select Waves network, then select MetaMask Format.
Select I have read and understand the rules above checkbox and click Show Waves Address in MetaMask Format.
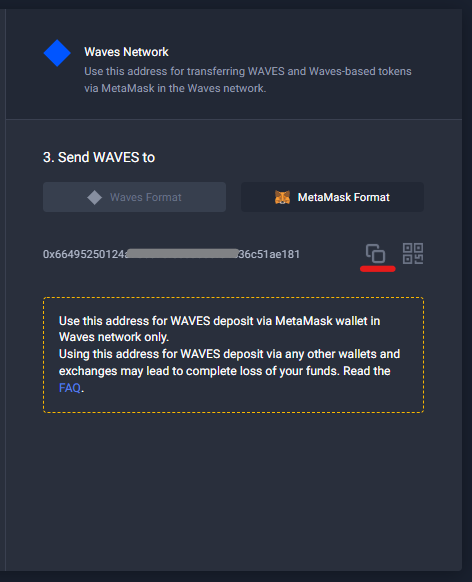
Copy the displayed address to clipboard.
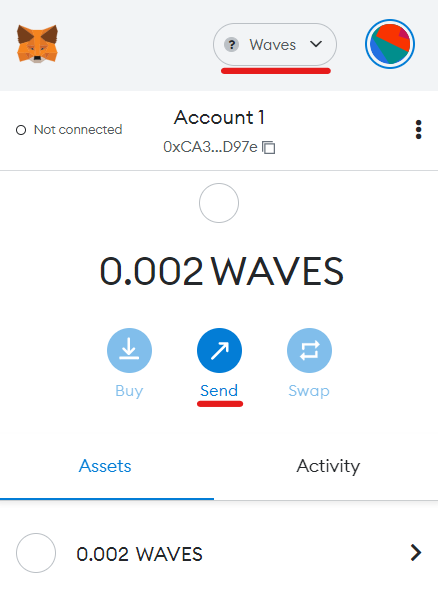
Open your MetaMask browser extension and make sure that Waves network is selected, then select the token that you want to deposit (for example WAVES) and click Send.
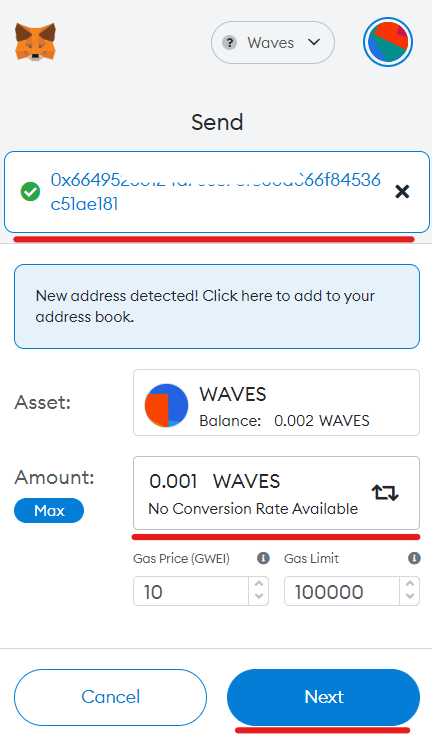
Paste the WX Network wallet address from clipboard in the Send to field.
Specify the amount of token that you want to deposit.
Leave the Gas Price and the Gas Limit fields by default and click Next.
Note: The standard transaction fee in Waves network is 0.001 WAVES, so please make sure that you have that amount on your MetaMask wallet.
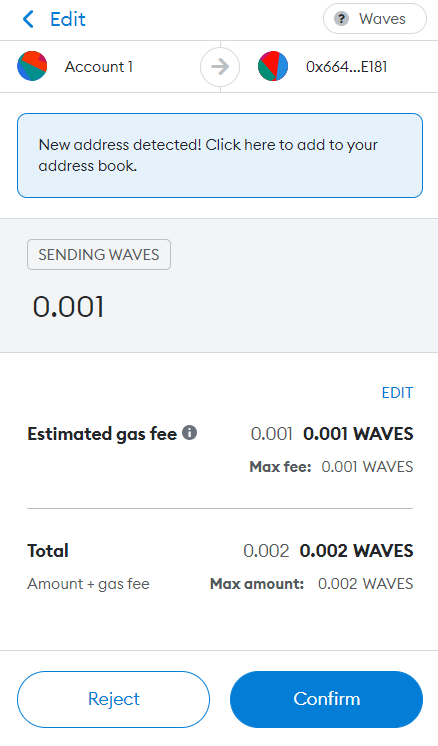
On the next screen, check that everything is correct and click Confirm.
You can review the transaction status on the Wallet > Internal Transactions (opens new window) tab or in Waves Explorer (opens new window).
# How to Add Tokens Supported in WX Network to MetaMask Wallet?
When you add Waves network in your MetaMask browser extension, it will be able to display balances of your tokens from Waves network. By default, only WAVES token balance is displayed.
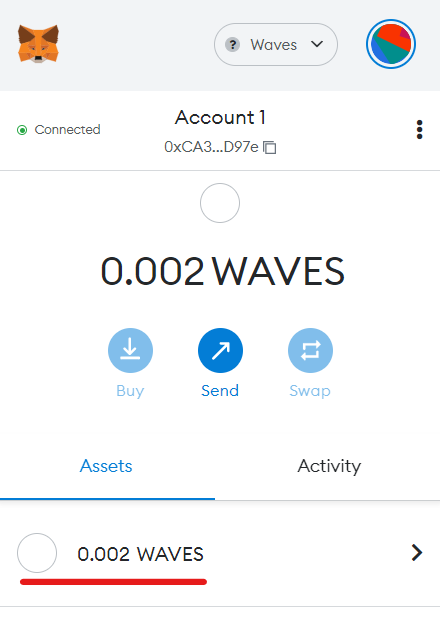
You can add other tokens supported in WX Network to your MetaMask wallet, so that their balances are also displayed.
To do so, open WX Network app, log in to your account and navigate to Wallet tab.
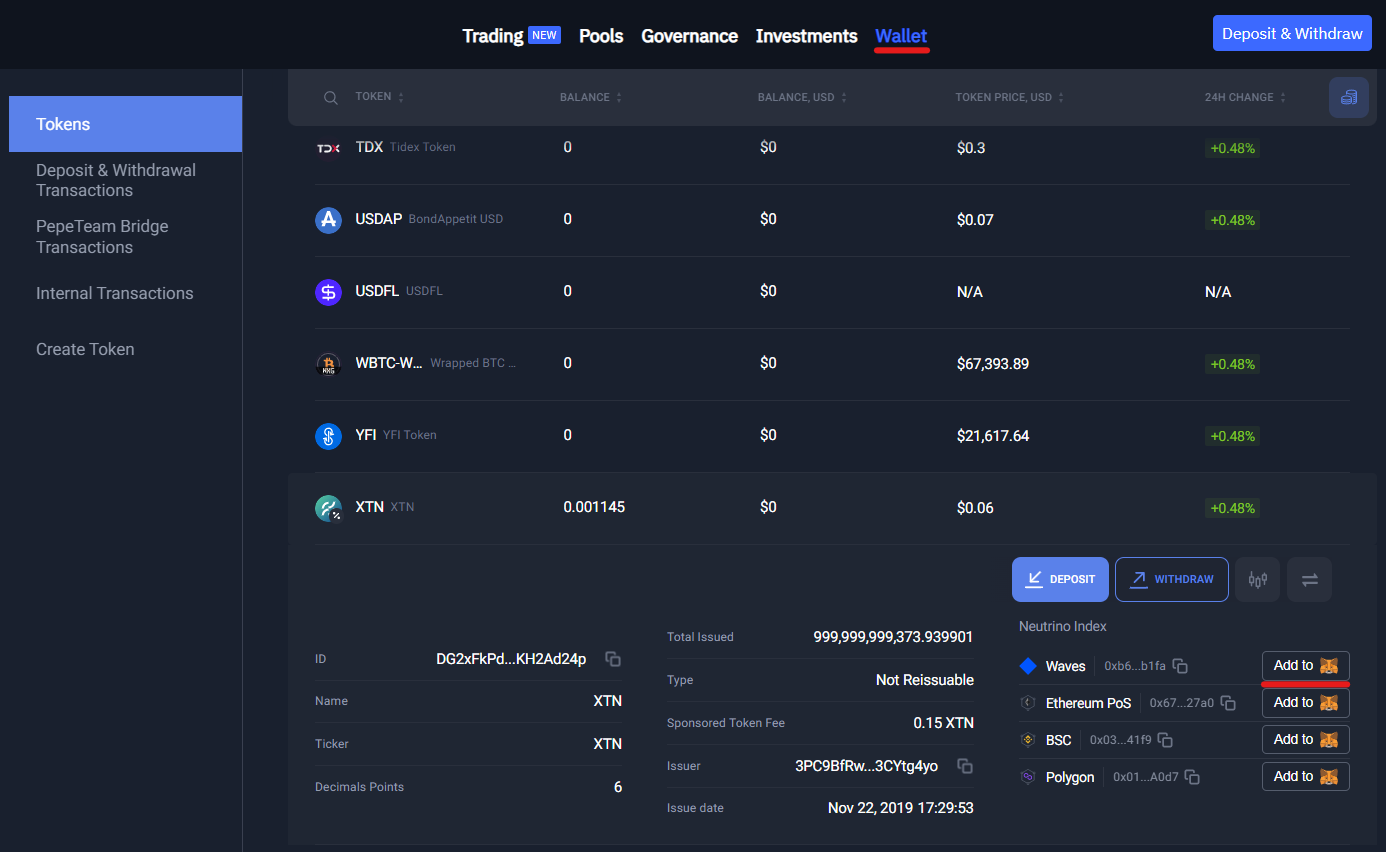
Find a token (for example, XTN) that you want to add to your MetaMask wallet and click Add to MetaMask next to Waves network icon.
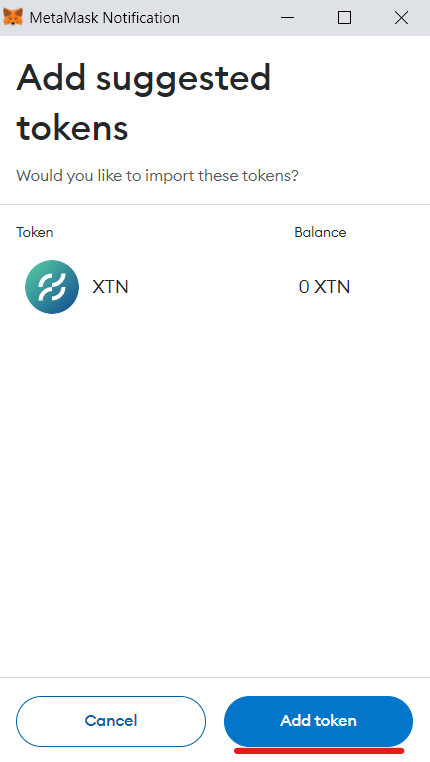
Your MetaMask browser extension will prompt you to confirm adding the token.
Click Add Token to confirm the operation.
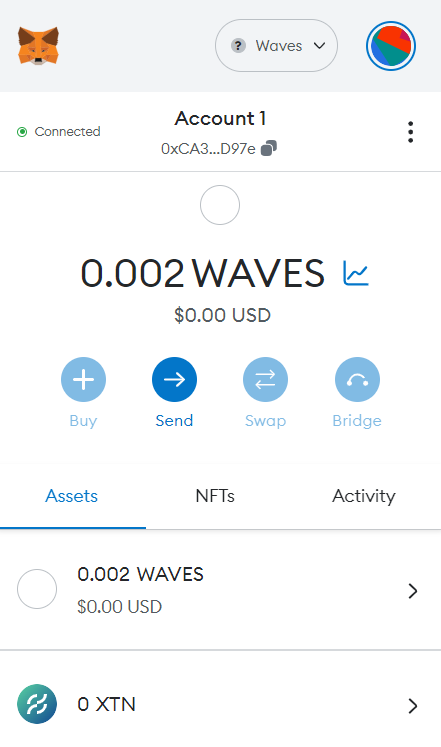
Now the newly added token will be displayed in your MetaMask wallet.